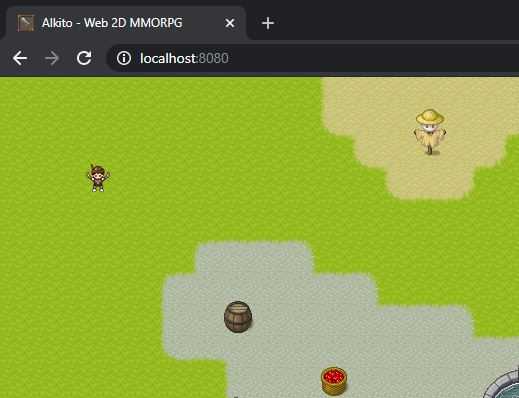
Devlog Phaser.js MMORPG | Part 1: create a map with Tiled
May 18, 2020
During the COVID crysis, I decided to take a new challenge: create a MMORPG with javascript. I had plenty of time, and building a game was something that had been running around in my head for quite some time.
I decided to share my journey through the development of my MMORPG with javascript (well, Typescript actually): Alkito.
Is it a Devlog, is it a tutorial ? Both, probably.
This is what have been done so far. You can check the Github repo here: https://github.com/Colmea/alkito-js-mmorpg:
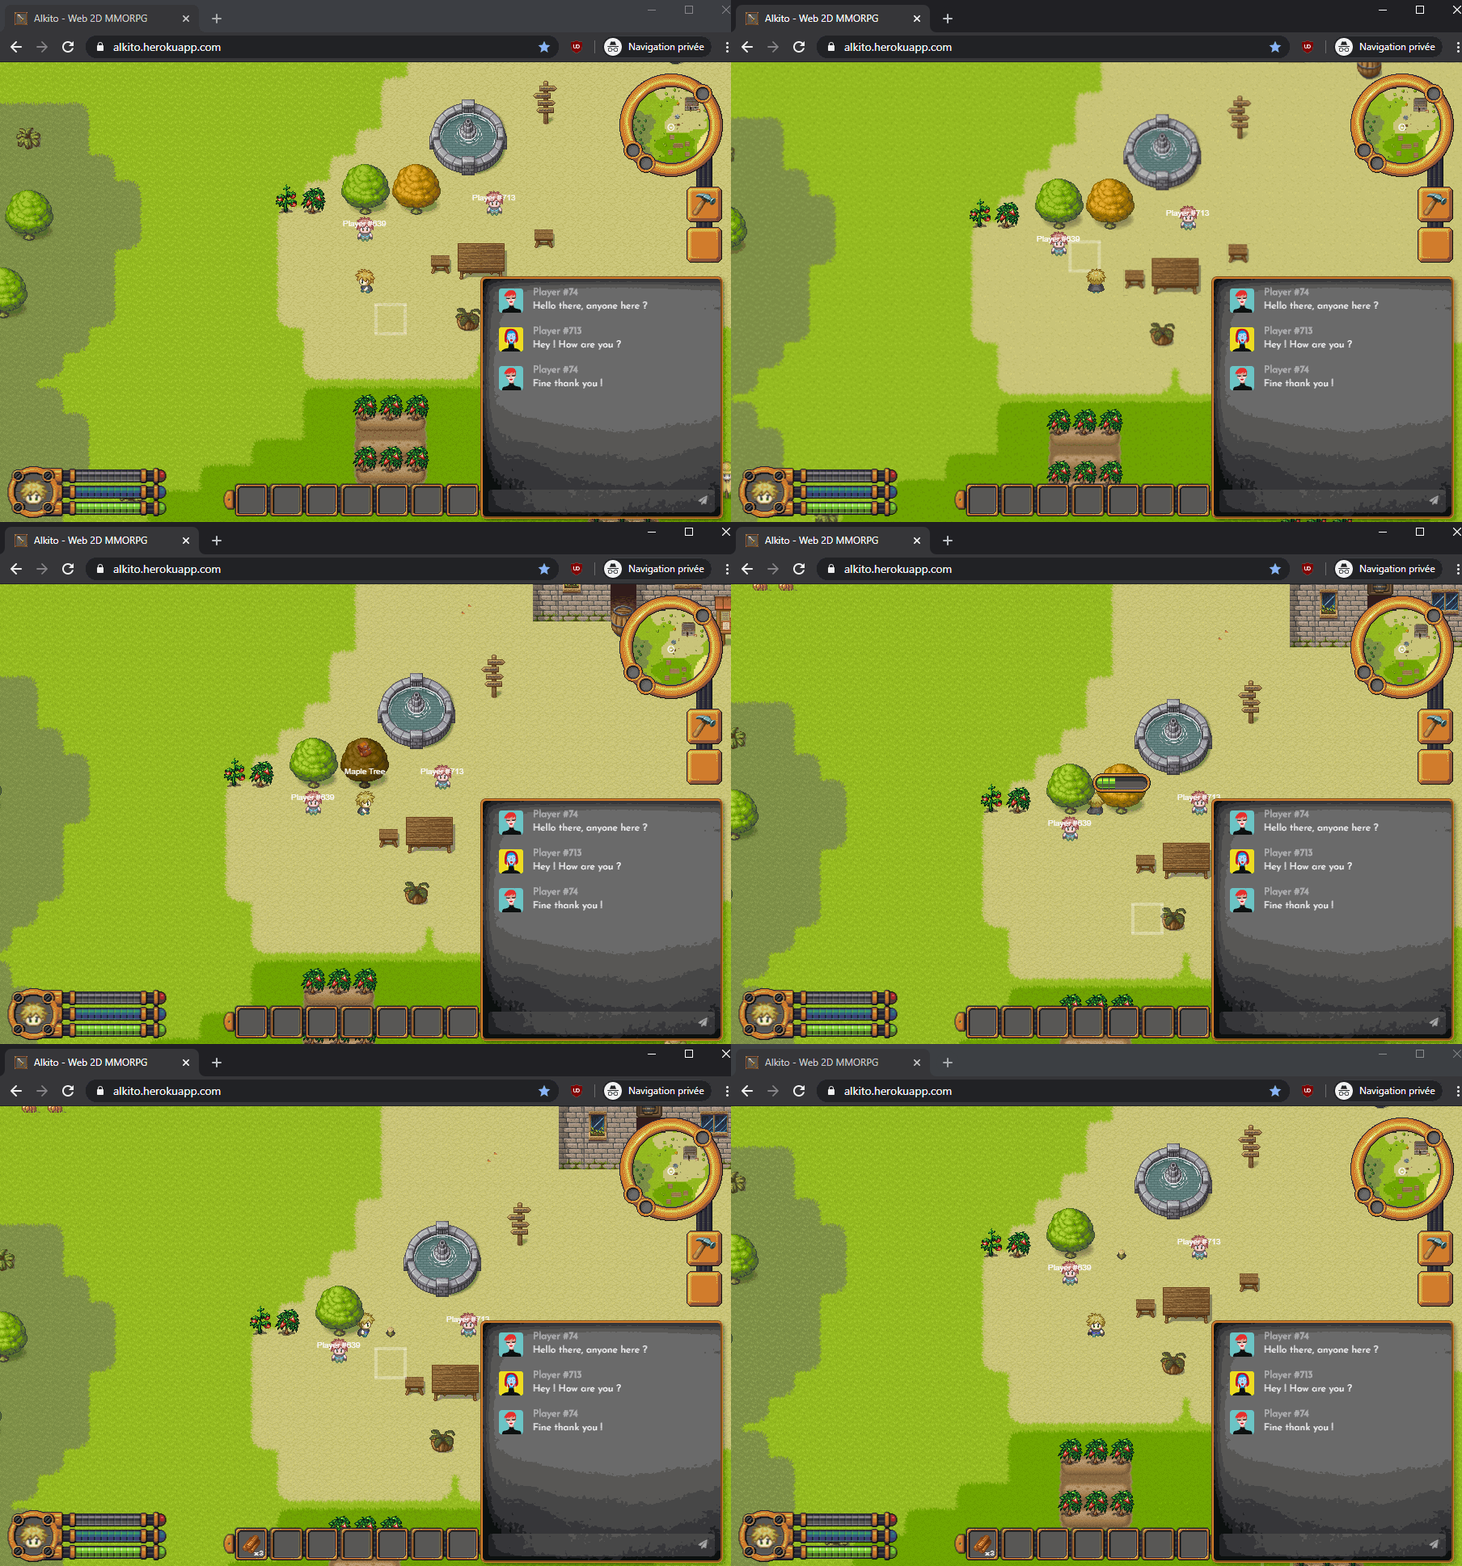
So, ready for this ? Let’s dive in !
The Stack™
Knowing I’m a frontend developer, I decided to use this stack for my MMORPG:
- Javascript (Typescript) for the Game Core.
- Phaser.js for the Game engine.
- React.js for the Game UI.
- node.js for the server.
We’ll definitely come back to each of these tech later.
Day 1: God Created the Earth (with Tiled)
First thing first, I needed a map for my game. There are many ways to manage this, but the easiest is probably Tiled.
Tiled is an open-source “tiled” map editor. It will allow us to “paint” a map with tiles (dirt, sand, grass, walls, …) and export it to be used in our game.
There are a lot of tutorials on the web to create a map with Tiled, but here are the steps:
- Create a new map (I chose a 32px*32px size for each tile).
- Import a Tileset image (you can find plenty on the internet, but choose one with 32px tiles).
- Create a layer
groundand paint ground tiles. - Create a layer
objectsand paint additional object tiles.
You should have something like this:
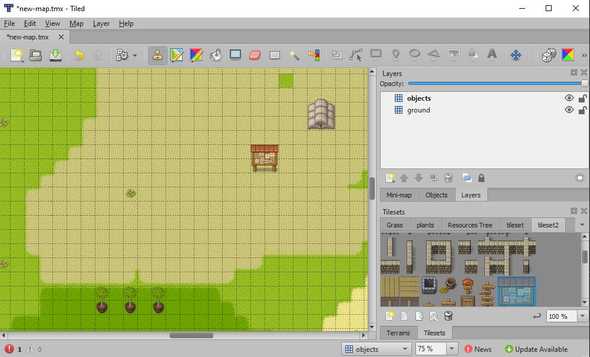
- Export the map in JSON (File > Export As… > Type: JSON map files (.JSON)).
You should now have a JSON map, and a image tileset (the one you imported in Tiled).
Import map in Phaser.js
Fortunately, Phaser.js supports Tiled JSON map out of the box !
We first need to load the JSON map as a tilemapTiledJSON, and the tileset as a spritesheet:
// This is our main scene
export default class WorldScene extends Phaser.Scene {
  constructor() {
    super('WorldScene');
  }

  preload() {
    // load JSON map
    this.load.tilemapTiledJSON('map', 'assets/my-map.json');
    // load tileset image
    this.load.image('myTileset', 'assets/tileset.png');
  }

  create() {}
}
To create the map, we then need to create a tilemap, link the tileset to this map, then create our two layers ground and objects.
// This is our main scene
export default class WorldScene extends Phaser.Scene {
  ...

  create() {
    // Create the map. 'map' is the key of the resource created in the preload
    const map = this.make.tilemap({ key: 'map' });

    // link the tileset to the map.
    // - 'tileset' refers to the tileset name used in the JSON map.
    // - 'myTileset' is the image's key loaded in Phaser.js
    const tileset = this.map.addTilesetImage('tileset', 'myTileset');

    // create the ground layer with our tileset
    const mapLayer = this.map.createStaticLayer('ground', tileset);
    // create the objects layer
    const mapLayer = this.map.createStaticLayer('objects', tileset);
  }
}
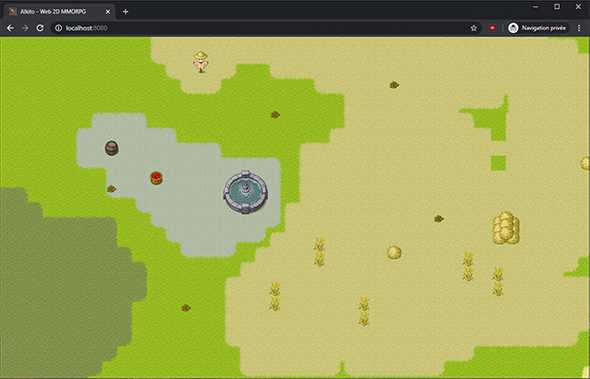
You should now have something like this in your browser:
Let us make man
Ok, enough with biblical reference.
To finalize this environment, we need a player. Again, we will use a Sprite Sheet. You can easily create one online with this awesome tool: Online Character Generator.
Click on “Save Result As PNG” at the bottom of the screen to download your sprite sheet.
![]()
/!\ Spritesheets from this tool are 64*64px, you should resize them to 32*32px to fit our 32px tiles.
We just need to import this spritesheet, then make the camera follows our player:
preload() {
  ...

  // Load player spritesheet. I set them to 32px because I resized it
  this.load.spritesheet('player', 'assets/player-spritesheet.png', { frameWidth: 32, frameHeight: 32 });
}

create() {
  ...

  // Create the Player from our sprite sheet
  // - 100 are the X and Y position
  // - 'player' is the key of the spritesheet
  // - 31 is the frame I want to use in our spritesheet (i.e. the 31th tile)
  this.player = this.add.sprite(100, 100, 'player', 31);
}
Move our player
Next step, we need to find a way to move our player on the map. I started with the most simple gameplay: move with keyboard.
create() {
  ...

  // Enable physics for our player
  this.physics.world.enable(this.player);

  // Setup camera to follows our player within the map
  this.cameras.main.setBounds(0, 0, this.map.widthInPixels, this.map.heightInPixels);
  this.cameras.main.startFollow(this.player);

  // Setup keyboard keys
  this.keys = this.input.keyboard.addKeys({
    up: 'up',
    down: 'down',
    left: 'left',
    right: 'right'
  });
}

update() {
  // playerBody is the physic body attached to our player
  const playerBody= this.player.body;
  const speed = 50;

  // on each update, we detect if one of our key is down
  // and update the player's velocity accordingly
  if (this.keys.up.isDown)
    playerBody.setVelocityY(-speed);
  else if (this.keys.down.isDown)
    playerBody.setVelocityY(speed);
  else if (this.keys.left.isDown)
    playerBody.setVelocityX(-speed);
  else if (this.keys.right.isDown)
    playerBody.setVelocityX(speed);
  else
    playerBody.setVelocity(0);
}
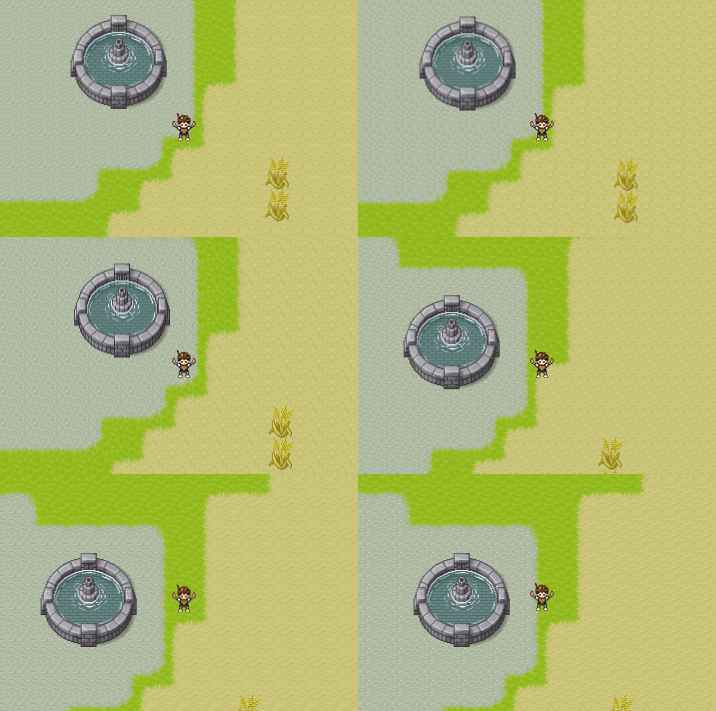
We now have a player, moving with our keyboard, and a camera which follows it.
Conclusion
There is still a lot to do: add animations, add collisions with objects, …
But you’ll need to wait for the next Devlog ;)
Cheers !
